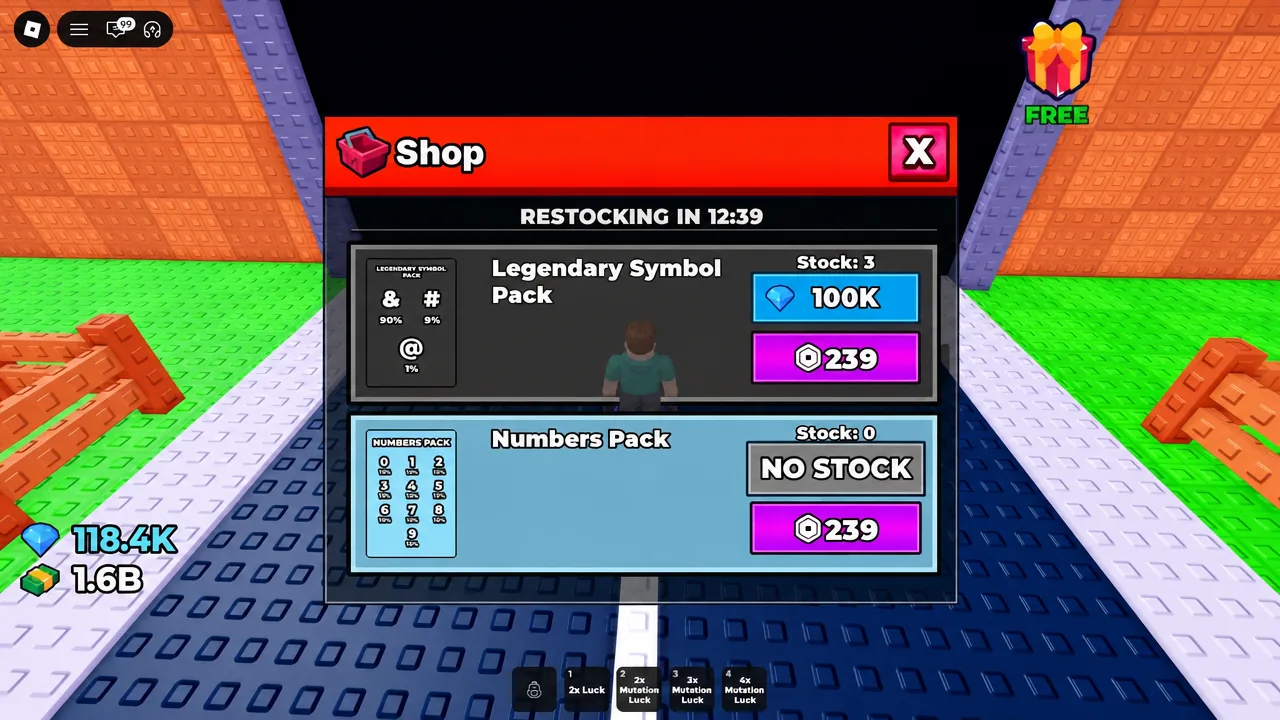
Guide review · September 12, 2026Compare reported Symbol Pack prices, read the dated Legendary panel for &, # and @, and avoid confusing stock, displayed odds and guaranteed new results.
Pick a Symbol Pack for a specific collection gap
The linked guides report three Shop tiers: Common at 1K, Rare at 25K and Legendary at 100K of the diamond-icon currency. These are dated public reports, not prices maintained by this site.
There is now a readable historical panel for the Legendary tier. Use that panel to identify a target, then compare the current listing before spending. It does not complete the Common or Rare rosters.
Legendary Symbol Pack: the displayed panel
| Symbol | Percentage printed on the pack graphic |
|---|
& | 90% |
# | 9% |
@ | 1% |
Evidence: the Shop image published with the September 4 update guide. The capture date and active modifiers are not independently known. These are displayed panel values, not this site's opening results or a guaranteed current base distribution.
What this means for your purchase
The listed outcomes are not evenly weighted. Do not budget as though three symbols automatically mean a one-in-three chance each.
A listed symbol is also not a promise that the next result will fill a collection gap. After obtaining the more common outcome, another purchase may repeat it. Decide which symbol you still need before spending more of the upgrade currency.
Stock is another condition
The illustrated Legendary listing has a stock counter. A budget alone does not establish availability. Check the stock message separately from the price; no repeatable stock-reset method is demonstrated here.
Keep the probability and the value separate
A smaller displayed share does not establish higher income, a larger sell return or a fair trading price. No Symbol-by-Symbol economics table is supplied by this image.
Open the source image
Protect useful copies before selling